#Linux shortcut to open terminal
Explore tagged Tumblr posts
Visit Tumblr Blog
Explore Tumblr blogs with no restrictions, modern design and the best experience.
Last Seen Tumblr Blogs


Fun Fact
In Q3 of 2020, 31% of US users access the Tumblr app daily.
Text
soon i am getting a new laptop that i will have to use in public, and i am thinking of doing the most arcane, malevolently set up, Doug Rattmann crazy levels, most incomprehensible Linux setup on it, so that nobody who isn't me, or atleast is not familiar enough with the specific linux utilities, can use it.
so that in the event i happen to leave the laptop unattended in public, (which i do not plan on doing, as i innately keep my backpack on me 100% of the time, so much so that multiple people have found it offputting, but in the event it do) nobody knows how to work it, or how it even works.
currently i've only a few ideas, such as - using i3wm with a fully rewritten key configuration, including having some common windows shortcuts such as alt + F4, ctrl + shift + esc, ctrl + alt + del, et cetera pull up premade messages heckling you for trying them - using only command line tools like feh, mpv, nmtui, & others for basic tasks - possibly automatically lock the session while the machine is in use if you fail to enter a password into a window, probably one it doesn't open automatically so you also need to know what fucking program to start from a terminal to enter a password you also need to know. (and possibly not have the program in the $PATH for extra evil)

LINUXPOSTERS OF TUMBLR - i call to you in a time of peril - heed my call, give me your most diabolical ideas on making an installation as hostile and arcane as you can. the machine doesn't even have to be 100% usable by myself, i'm fine with it being annoying as fuck to use if it means that it's bafflingly unusable to those around me.
no holds barred. if it's funny, or actively hostile to a user, or both, you may suggest it.
#linux#linuxposting#linux magic#evil#computer science#system shock references appreciated#i want this to be the most evil installation i will ever have to conjure#no holds barred#gumbuk 9 originals
156 notes
·
View notes
Text
pro tip for programmers - how to alias
hey, so you know that annoying thing that happens when you're coding, and you need to run/test the same program 100 times in a row, so you end up typing "python3 testScriptWithASuperLongName.py" into the terminal about 80,000 times?
well, there's a better way! it's called aliasing :D
in your bash shell (or zsh, or whatever shell you use, but bash is the default on VSCode and most people on tumblr use VSCode, so I'm using bash as the default to explain this concept) you can set an alias, essentially a shortcut command, that runs longer commands.
(yes you can just use the up arrow key to re-run the same command, but sometimes you're typing other things into the terminal too and you don't feel like hitting the up arrow key four times in a row, and also this is just a cool and useful tip to get comfortable with aliasing so shhhh)
so, in your terminal shell, just type this:
alias run="python3 testScriptWithASuperLongName.py"
now, you can run that entire super long command, just by typing the word "run" into your terminal. Here's a screenshot of an example on my computer to make it make more sense:

in this example, i just created a simple python file that contains one line of code: print("it works!")
then, as you can see, by setting the alias to run, i can now run that file, runningatestscript.py, simply with the command 'run'.
the best part is, this alias is temporary - it only lasts as long as your shell session is open. so once you close the terminal, the run alias is cleared and you can set it again next time to any file or task you're currently working on, to save yourself a lot of typing, typos, and time.
so if you want to, you can get in the habit of always setting a run alias in the VSCode terminal for whichever file you're working with as soon as you get everything open. that way, when you need to run the same file 50 million times, you have a super easy way of doing it! you can even set it to a single letter if you want to go for maximum speed, but i prefer to use whole short words, because they're easy for me to remember.
note: if you do want to set an alias to work for all sessions, you can simply add it to your ./bashrc file. this is a common way to automate repeatable tasks, and simply to set easier-to-remember commands for terminal commands that are really complicated/confusing/hard to remember.
for example, i saved the alias checkboot="[ -d /sys/firmware/efi ] && echo 'UEFI mode' || 'BIOS mode'" into my zshrc file (zsh equivalent of bashrc file). this way, no matter how many times i rebooted my machine, i would always be able to quickly check which boot mode was running by simply typing 'checkboot'.
yesterday i was updating my boot mode from BIOS to UEFI on my very old machine that is technically compatible with UEFI, but not configured for it by default. So it was extremely helpful and saved me the time and headache of having to remember and type that long-ass command a thousand times in between many different reboots and new shells.
if you have any tasks like that, or terminal commands that you know would be useful to you, but you can never remember them when you need them, i highly recommend getting comfortable with aliasing! it can be super useful to simply set custom aliases for all the commands you don't want to remember, so that you can automate things away and not have to worry about so much linux syntax all the time when you're tring to focus on programming.
i know this may seem like a simple tip to some, but i only learned about it recently and it's been extremely helpful to integrate into my workflow and customize my OS with! so i thought it might be worthwhile to some people if i share :) hope it helps!
#codeblr#linux#hacker#compsci#hack the planet#hacking#studyblr#coding#progblr#programmer#programming#women in tech#women in stem#women in computing#women in cs#comp sci#coding tips#programming tips#software development#software developers#vscode
115 notes
·
View notes
Text
Linux Life Episode 87
Hello everyone and welcome to my ongoing piddling about in my corner of the world of Linux. Well this month I have been playing around with Wayland and trying to work out whether I am ready to switch to it.
I admit that I recently switched back to X11 when using KDE Plasma 6.2 as several tools don’t work well in it under Wayland.
When in X11 I use Cairo Dock as a program launcher which does have a version that allegedly works with Wayland but the team of Cairo Dock admit its alpha and is buggy. Indeed it worked for a while then it started messing up shortcuts. Also in X11 I can move the bar up above the main KDE panel so I can still see the icons and switch tasks etc.
In X11 it works fine. In Wayland it is just too basic and the coders of it are in no hurry to create a full version until Wayland setup some standards regarding key bindings etc.
Which I guess is fair enough but annoying.
When it comes to collecting screenshots I normally use Shutter. I have tried others such as Flameshot and others but they seem to have issues when grabbing certain screenshots such as Steam games and Shutter just works.
However under Wayland. Shutter has been hacked to work but will only allow you to grab the desktop only and none of the other options are available.
So I have been using X11 to allow Shutter to continue to work.
Maybe I’m a bit old fashioned but I like to have things that work. Also OBS Studio works with Wayland but apparently has issues when selecting input sources and areas.
In time they may fix this but at this time it doesn’t quite work as it should.
So I admit if I am using KDE Plasma I won’t be using the Wayland version.
Taking a slight side step ...
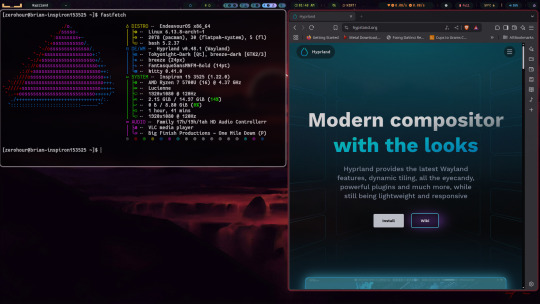
I have recently decide as I was noodling about in the Wayland compositing wibble I decided to try Hyprland.
Well I must admit at first I really didn’t get on very well with it and to be honest while I could open a few windows and I managed to use ghostty as my terminal.
However after a bit of a play I didn’t know how to close all the open windows and had to faff around just to get the slightest thing open.
So I was about to give up. However I decided to look up the wiki and it gave a few preconfigured options. I admit I downloaded and installed the JaKooLit dot files.
I must admit that it has actual made Hyprland useful and with a bit of playing I finally managed to get most things working and yes it can be fun and it’s pretty fast but I really don’t see me using it regularly.
It has allowed me to capture screenshots using certain keys so Hyprland has solved my requirements and Shutter is not needed using it but until OBS Studio issues in Wayland are sorted I will have to go back to KDE Plasma 6 X11 if I want to capture video.
I really didn’t understand Hyprland when i first started but I admit that the preconfig has made it useable once you get used to the quirkiness. I am even willing to live without a dock.
Hopefully OBS Studio will manage to get around its issues and who knows I might even switch to Hyprland and stop using KDE Plasma.
I’m sure someone will advise me better Hyprland tricks but for now I have it working and it is not bad. In time I could get used to working with Hyprland. Once you get the hang of it, it is quite fast and useable.
Wayland is good but not quite 100% there. Not far its about 95% workable, it just needs the last few things to get working.
Well that’s enough waffle for now ... Until next time ... Take care.
3 notes
·
View notes
Note
quick q about ffxiv; are you on plain arch or an arch-based distro? gathering intel to help a friend switch to linux in a month or two & don't play mmos myself; I'd like to see about taking the non-steam version for a spin on my Garuda installation beforehand to see if it generally works well, but haven't pulled the trigger yet.
either way, good tip about just using "add to steam"; hadn't considered that!
I'm on plain arch with KDE using the mesa drivers that come with the kernel for an arc 750 (which is about all we get on intel dgpus atm, I've tried the official ones included with ubuntu but I'm not convinced they're better and this is an unprompted tangent so moving on). Giving equivalency for performance is a little hard because arc gpu's are hard to pin in a hierarchy with the state of their drivers, but FFXIV locks to a steady 60fps at 1440p and hovers up around 100fps at max settings if I uncap it. This will likely change in a month when the new expac comes out, but your FFXIV-playing friend already knows that part I'm sure 🙏
On my driver tangent, someone in the reblogs made a good point about proprietary drivers and I'd amend, for the general viewing public while I'm here, that the two main cases where that will be relevant are nvidia gpu drivers and wifi adapters, since amd and intel have open source ones that most modern distros will pack in or give an option in setup for. Ubuntu and the archinstall script have those options and I thiiiink mint did too the last time I turned my nose up at it. So in most cases I would only direct a newcomer to seek out drivers if they are having an issue. Or nvidia shenanigans happen, as they are wont to do. My overall distro experience is fairly limited to ubuntu, arch, and the barest whiff of armbian, but the proprietary driver install in ubuntu's setup is dead easy and ubuntu's desktop environment comes with a shortcut that directs to the update settings for proprietary drivers. Its fantastic for terminal-shy newcomers and old "can't be bothered" people like myself.
5 notes
·
View notes
Text
My Favourite Gnome Extensions
Over the past few years I've found myself settling into gnome and I would like to introduce y'all to some of my favourite extensions.
1 - Gtile

Gtile is easily a must add to any Linux install with gnome, a highly customise-able shortcut to tile your windows onto a grid size of your choosing. An absolute must have for people with large/multiple monitors and a perfect extension for the power user in you. GitHub: https://github.com/gTile/gTile Gnome: https://extensions.gnome.org/extension/28/gtile/
2 - Just Perfection
Just perfection is the tool for getting those slight tweaks you didn't know you needed out of gnome, from hiding parts of the system UI to simple behaviour changes its got at least one feature for you. I personally use the workspace wraparound while disabling the visibility of the activities button and workspace popup for a cleaner UX. GitLab: https://gitlab.gnome.org/jrahmatzadeh/just-perfection Gnome: https://extensions.gnome.org/extension/3843/just-perfection/
3 - Dash to Dock
Dash to Dock is my preferred options in a sea of dash replacements, its simplicity and ease of use with excellent GTK theme compatibility and array of options won me over compared to the others GitHub: https://micheleg.github.io/dash-to-dock/development.html Gnome: https://extensions.gnome.org/extension/307/dash-to-dock/
4 - Honourable Mentions
Here's the spot for all the extensions that are great but i don't think need a whole spot and a GIF (pronounced GIF of course) Caffeine Caffeine is an extension that goes on your toolbar, it adds a button to disable your screen from fading over time, excellent for when you need to keep something open. GitHub: https://github.com/eonpatapon/gnome-shell-extension-caffeine Gnome: https://extensions.gnome.org/extension/517/caffeine/ Workspace indicator Another toolbar extension to display whatever workspace you're on at the time, a perfect pair with disabling the workspace popup in just perfection for a clean minimal alternative GitHub: https://github.com/tty2/horizontal-workspace-indicator Gnome: https://extensions.gnome.org/extension/3952/workspace-indicator/ Launch new instance A great extension included by default with Ubuntu, ever have your browser open on one workspace and try to open it on another and it takes you back? this fixes that, you can now pretend to be productive on one workspace and open Tumblr on the other with ease ^w^ GitLab: https://gitlab.gnome.org/GNOME/gnome-shell-extensions Gnome: https://extensions.gnome.org/extension/600/launch-new-instance/ Rounded Window Corners For my final extension I'm going to mention something not everyone needs but I use for the aesthetic. Does your GTK theme have rounded corners but some windows (I'm looking at you Firefox and gnome terminal) have sharp corners at the bottom? Fear no more, this extension gets rid of those pesky right angles with a wide array of settings to customise the angle, size and even border of those corners. With options to blacklist certain applications and even have custom settings for specific applications its a must have for the ricer in you. GitHub: https://github.com/yilozt/rounded-window-corners Gnome: https://extensions.gnome.org/extension/5237/rounded-window-corners/
32 notes
·
View notes
Text
Me, Saturday: "Let this UX failure between Linux, VSCode and the Markdown plugin inspire me to spend all afternoon and evening writing an excruciatingly boring text on systems compatibility that will never be relevant but will cost me 5-6 hours of my life and increase my hatred for UX as a field and as a concept."
Me, Sunday: "... why do I even have followers. Why do I have more followers today than I did yesterday? Why do the new ones look like real people instead of bots. Who is here for this?"
---
Anyway it was actually quite hard to find a key that would mean something to the OS, to a background service, to a client and to a plugin at the same time - mainly because of the background service, those are typically either bundled with the OS or have the manners to not intercept keystrokes.
If I hadn't experienced that emoji plugin[1] failure I probably wouldn't have thought of this at all, even though the markdown plugin conflicted with VSCode - I would just have though "lmao this is annoying but I guess it makes sense that they're squatting ctrl-b for bold"
Letters
F:
File
Find
Fed (danish for Bold, e.g. Microsoft Office uses it when you have DK keyboard layout, Ctrl+F makes text bold and so Ctrl+B opens the "find" dialog.)
M:
OS - maximize window
Browser tab with youtube - mute
R:
Run (With super, Microsoft equivalent to ALT-F2)
Refresh (With control, refreshes browser tab)
'R' (Inserts R in browser form, or reloads gun in browser game)
T:
Open terminal
Open new tab
Text power tool plugin
Non-letter
Esc:
Lock screen (with super, Linux)
Changes active focused program? (With alt, Linux)
Clear focus or Go Back (any number of apps)
Space:
Change keyboard language (For some reason???)
activate focused component inside browser tab
activate focused component in app UI
---
[1] This was such an unforced error! IBUS (the keyboard interceptor that allows emoji and unicode) comes with my distro they could have set it up to use a [super] combination. What the fuck. They know this in general - with two valid exceptions[2], every shortcut they have either starts with [super] or acts on a focused component.[3]
[2] Ctrl+Alt+Del, which is a cross-OS, cross-hardware standard, and so: Valid. No program is going to squat on that, and ALT+F2 which is a cross-distro standard and so slightly less valid but makes sense.
[3] Except NO THEY DON'T. All the ones that are listed in their online documentation are like that - if you go to the actual shortcut menu in the OS and look through it, you'll find plenty that don't start with super! This is why we cannot have nice things!
5 notes
·
View notes
Text
Just "install Linux" isn't a good solution to the broader problem of tech illiteracy and corporate monopolization. Like, I love Linux, I've been using Linux Mint for about 10 months now and it was easily the best decision I've made regarding computers (second best looks to be ditching the iPhone but that was pretty recent so holding off on calling that right now). But "install Linux" is an individual solution to a systemic problem.
Linux (specifically the kernel and important libraries) is dependent on two main groups: individual open-source maintainers (like the ones maintaining GNU coreutils or the xz compression tool (I don't think I need to explain why that's an issue)) and giant tech corpos like Microsoft, Red Hat, Amazon, and Google to make contributions. For desktop Linux distros and environments, it's usually teams that need sponsoring or a commercial venture to keep doing what they do (for the former see the Linux Mint team, for the latter see System76's distro, Pop!_OS).
Learning Linux has taught me more about my computer and computing in general but that individual learning isn't enough on its own. Fuck Apple and fuck Microsoft, but Linux alone won't save us. It's been a whole other learning curve, searching up weird error messages or finding specific packages for install guides. I am way more comfortable with the computer now but the terminal and the command line were their own journeys to learn.
Thankfully, you don't always need the command line to get things done. Linux Mint includes a little applet on your desktop panel (the one that contains your currently running programs and start menu) that tells you when there are updates to your programs and lets you upgrade them graphically. It's still the same "sudo apt update && sudo apt upgrade" to the computer, but it's a great way to just have a normal desktop experience without having to jump into something unfamiliar. Linux Mint's team designs their desktop to have a Windows 7 look and has many of the same keyboard shortcuts to move things around (Win+Arrow key to move windows around, Alt-F4 to kill a program, etc) AND lets you move windows between different workspaces so you can keep your stuff separate and organized. The Cinnamon desktop is AMAZING! The Windows 11 desktop was so bad it single-handedly made me switch.
Again, Linux will not save tech illiteracy, but if you want a better computing experience, know that Windows is not your only option.
Technophobes need to apologise for "just put it in plain English you stupid machine!" because, well for one the decline in accurate error messages in favour of simplicity has contributed to the rise of tech illiteracy, but also because now whenever an "app" has a net connection error it will pop up a box saying something like "oo ooopsie! Your super duper feed went poo poo. We'll try again soon!" which having said to me by a corporation is about 8 million times worse than having to hear the word "network".
31K notes
·
View notes
Text
Different types of text editors in Linux
In Linux, there are a variety of text editors available, catering to different user preferences, from simple terminal-based editors to full-fledged graphical text editors. Here are some of the most popular types of text editors you can use on Linux:
1. Command-Line Text Editors
These editors are used directly in the terminal, offering a lightweight and efficient way to edit files.
Vim (Vi IMproved) Vim is an enhanced version of the classic vi editor. It is very powerful and flexible, especially for programmers. It has multiple modes (normal, insert, visual, etc.) and supports advanced features like syntax highlighting, plugins, and macros.
Nano Nano is a simpler text editor compared to Vim. It is user-friendly, especially for beginners, and provides on-screen keyboard shortcuts for common actions.
Emacs Emacs is a highly customizable and extensible text editor, known for its powerful features like integrated shell, version control, and an extensive library of plugins.
Vi The original text editor, vi is available by default on many Linux systems. While it doesn't have the advanced features of Vim, it's still highly functional for basic text editing.
Ed ed is a line editor, often considered as the predecessor to vi. It's very minimal and requires command-line knowledge to operate effectively.
2. Graphical Text Editors
These editors provide a graphical user interface (GUI), which can be more user-friendly, especially for those who prefer a point-and-click interface.
Gedit Gedit is the default text editor for the GNOME desktop environment. It is simple, lightweight, and supports syntax highlighting for many programming languages.
Kate Kate (KDE Advanced Text Editor) is the default text editor for the KDE desktop environment. It provides powerful features such as multiple document editing, syntax highlighting, and a built-in terminal.
Leafpad Leafpad is a lightweight, simple text editor designed for basic text editing tasks. It’s ideal for users who need a no-frills, fast editor.
Xed Xed is the default text editor for the Linux Mint desktop environment. It is a simple, fast, and lightweight text editor.
3. IDE-Based Editors
Integrated Development Environments (IDEs) are more specialized editors with features like debugging, code completion, and project management, mainly used by programmers.
Visual Studio Code (VS Code) VS Code is a popular open-source text editor with robust support for development. It offers features like extensions, debugging, Git integration, and a wide range of language support.
Sublime Text Sublime Text is a fast and highly customizable text editor for code and markup. It is often preferred for programming due to its intuitive interface, powerful search features, and plugin support.
Atom Atom is a highly customizable, open-source text editor developed by GitHub. It is aimed at developers and offers features such as a built-in package manager, Git integration, and real-time collaboration.
IntelliJ IDEA IntelliJ IDEA is a powerful Java IDE, but it also supports other programming languages with plugins. It offers advanced features for debugging, testing, and version control.
4. Specialized Text Editors
These editors are designed for specific use cases or workflows.
TeXstudio TeXstudio is a LaTeX editor that provides an integrated environment for creating and managing LaTeX documents. It includes features such as syntax highlighting, auto-completion, and built-in PDF preview.
VSCodium VSCodium is a community-driven, open-source version of VS Code, without any telemetry or proprietary Microsoft code. It’s ideal for users who prefer a fully open-source version of VS Code.
Gnote Gnote is a note-taking application inspired by Tomboy. It's simple and effective for managing text-based notes.
5. Text Editors for Programmers
These are designed to offer advanced features for software development and code editing.
Brackets Brackets is an open-source editor focused on web development, providing real-time preview, inline editing, and preprocessor support.
Geany Geany is a lightweight IDE that supports many programming languages. It’s fast and comes with features like code completion, syntax highlighting, and project management.
Notepadqq Notepadqq is an open-source text editor for programmers. It offers syntax highlighting for multiple languages and is often seen as a Linux alternative to Notepad++.
6. File Managers with Built-in Editors
Some file managers in Linux also offer text editing capabilities, often for quick edits of configuration files.
Nautilus (with a custom editor) Nautilus is the default file manager for GNOME, and it can be configured to open a text editor when you need to modify files quickly.
Thunar Thunar is the default file manager for XFCE, and like Nautilus, it can be configured to launch a text editor for quick edits.
Conclusion:
The choice of text editor in Linux depends on your needs and level of expertise. Command-line editors like Vim and Nano are preferred by experienced users for their efficiency, while graphical editors like Gedit and Kate are great for those who prefer a more user-friendly interface. IDEs like Visual Studio Code and Sublime Text are ideal for developers, and specialized editors like TeXstudio cater to specific workflows.
for more details please visit
www.qcsdclabs.com
www.hawkstack.com
0 notes
Text
These days, graphical user interfaces rule our screens. As such, the command line may appear to be a thing of the past. It is still a powerful tool, though, for anyone who wants to fully utilise a computer's potential. Greetings from the Linux command line universe. Here, we will uncover the tips and tricks that can transform you from a casual user into a command line maestro. Essential Command Line Basics for Linux We'll lay the groundwork for your exploration of the Linux command line in this article. In order to make sure you are comfortable using the terminal and carrying out commands successfully, we will start with the fundamentals. Open a Terminal You can use the terminal application that comes with most Linux distributions. Usually, you can locate it by looking for "Terminal" in the Applications menu or using the system search bar. Basic Commands: ls: List files and directories in the current directory. bashCopy code ls cd: Change the current directory. bashCopy code cd Documents pwd: Print the current working directory. bashCopy code pwd mkdir: Create a new directory. bashCopy code mkdir NewFolder touch: Create an empty file. bashCopy code touch myfile.txt Navigating the File System: Using cd to navigate through directories. bashCopy code cd .. Using ls to list the contents of a directory. bashCopy code ls /home/user/Documents File Manipulation: cp: Copy files or directories. bashCopy code cp file.txt /path/to/destination/ mv: Move or rename files or directories. bashCopy code mv oldfile.txt newfile.txt rm: Remove files or directories. bashCopy code rm myfile.txt Viewing File Content: cat: Display the entire content of a file. bashCopy code cat myfile.txt less or more: View file contents one screen at a time. bashCopy code less myfile.txt head and tail: Show the first or last few lines of a file. bashCopy code head myfile.txt File Permissions: Use chmod to change file permissions. bashCopy code chmod 755 myscript.sh chown changes the owner of a file or directory. bashCopy code sudo chown user:group myfile.txt File Searching: find: Search for files and directories. bashCopy code find /path/to/search -name "*.txt" grep: Search for text within files. bashCopy code grep "keyword" myfile.txt Managing Users and Permissions: passwd: Change your password. bashCopy code passwd sudo: Execute a command with superuser privileges. bashCopy code sudo command useradd and userdel: Add and delete user accounts. bashCopy code sudo useradd newuser sudo userdel olduser Help and Manuals: To get help for a command, use the --help option. bashCopy code ls --help Use the man command to access comprehensive manuals. bashCopy code man ls Keyboard Shortcuts: Up and Down arrow keys for command history. Tab key for auto-completion. Package Management: For Debian/Ubuntu systems (using apt): bashCopy code sudo apt update sudo apt upgrade For CentOS/RHEL systems (using yum): bashCopy code sudo yum update These examples should help you get started with the Linux command line and understand how to perform basic operations. How to Use the Linux Command Line Productively We're going to look at some methods and resources that will help you work with the Linux command line environment more effectively and efficiently. Therefore, mastering these abilities is crucial to optimising your workflow and developing your command-line skills. Tab Completion in Linux command line By pressing the "Tab" key, you can quickly and efficiently complete file and directory names, command names, and other arguments in the Linux command line thanks to a powerful feature called tab completion. It saves you time and prevents you from manually typing lengthy and possibly mistake-prone names. Here's how tab completion functions and some advice on how to use it efficiently: File and Directory Names: When you start typing the name of a file or directory, you can press the "Tab" key to autocomplete it.
If there's a single matching option, it will be completed for you. If there are multiple matching options, pressing "Tab" twice will display a list of all possible matches for you to choose from. For example, if you have files named "file1.txt" and "file2.txt," and you type cat f and then press "Tab," it will complete to cat file. Command Names: Tab completion also works for command names. When you start typing a command, pressing "Tab" will attempt to complete it. If you press "Tab" twice, it will list all available commands that match what you've typed so far. For example, if you start typing su and press "Tab," it might complete to sudo or sum. Pressing "Tab" twice will show you all available commands that start with "su." Directory Paths: Tab completion works with directory paths as well. You can start typing a directory path, and it will complete both directory names and the path itself. For example, if you want to navigate to the "/var/www" directory, you can type cd /v and then press "Tab" to autocomplete to cd /var/. Options and Arguments: Tab completion can also help you complete command options and arguments. For example, if you type ls -l /ho and press "Tab," it can autocomplete to ls -l /home/. Custom Tab Completion: You can create custom tab completion scripts or functions for specific commands or tasks. These scripts can provide tab-completable options and arguments based on your needs. Custom tab completion scripts are typically stored in files like /etc/bash_completion.d/ or loaded in your shell's profile configuration (e.g., .bashrc or .zshrc). Escaping Spaces: If you have spaces in your file or directory names, you can use backslashes or quotes to escape them. For example, if you have a file named "my file.txt," you can type cat my\ file.txt or cat "my file.txt" to use tab completion. Linux Command History and Recall Ever use a command only to find yourself in need of it again a short while later? Command history and recall allow you to quickly access commands that you have already run. A list of recent commands, each with a number attached, is displayed by the history command. An exclamation point (!) followed by the command number can be used to rerun a command (e.g.,!42 will rerun the 42nd command in your history). By pressing Ctrl + R and then entering a keyword from the command you're looking for, you can also search your command history. By using this feature, you can avoid typing lengthy, intricate commands again. Using Aliases in the Linux Shell Aliases are like custom shortcuts for your commands. You can create your own shorthand for frequently used or complex commands. For example, if you often find yourself typing ls -l to list files in long format, you can create an alias like this: bashCopy code alias ll='ls -al' After creating the alias, you can use ll instead of ls -al to list files. Linux Command Line Shortcuts Command line shortcuts are quick key combinations that help you navigate, edit, and control your terminal more efficiently. Here are a few essential shortcuts: Keyboard Shortcut Description CTRL + A Moves the cursor to the beginning of the line. CTRL + E Moves the cursor to the end of the line. CTRL + U Deletes text from the cursor to the beginning of the line. CTRL + K Deletes text from the cursor to the end of the line. CTRL + L Clears the terminal screen. CTRL + C Interrupts (stops) the current command. CTRL + D Exits the current shell or terminal session. CTRL + Z Suspends the current command (resumable with the fg command). Pipelines and Redirections in Linux command line Pipelines and redirections are powerful features in the Linux command line that allow you to manipulate input and output streams of commands, enabling you to perform complex tasks efficiently. Here's some examples of pipelines and redirections: Pipelines (|): Pipelines allow you to chain multiple commands together, passing the output of one command as the input to another.
This can be incredibly useful for processing and transforming data on the fly. For example, let's say you have a list of files in a directory, and you want to find all the files that contain a specific keyword: bashCopy code grep "keyword" *txt In this example, grep searches for the keyword in all txt files in the current directory. However, if you want to narrow down the results to only show the filenames containing the keyword, you can use a pipeline: bashCopy code grep -l "keyword" *txt | xargs -I basename Here, the grep command searches for the keyword and uses the -l option to list only the filenames. The | symbol passes this list of filenames to xargs, which then extracts the basename of each file, giving you a cleaner list of matching filenames. Redirections (>, >>, : Redirects the output of a command to a file, overwriting the file if it already exists. bashCopy code echo "Hello, world!" > output.txt >>: Redirects the output of a command to a file, but appends it to the file if it already exists. bashCopy code echo "Appended text" >> output.txt and 2>>: Redirects standard error (stderr) output to a file, overwriting or appending as needed. bashCopy code command_that_generates_error 2> error.log command_that_generates_error 2>> error.log Combining Redirection and Pipelines: You can combine redirection and pipelines to perform more complex operations. For instance, you can redirect the output of a command into a file and then use that file as input for another command. For example, you can sort the lines in a file and save the sorted result to another file: bashCopy code sort < input.txt > sorted_output.txt These are just a few Linux command line examples for pipelines and redirections. These facilitate data manipulation and process automation by enabling you to carry out an extensive array of tasks with efficiency and flexibility. Searching and Manipulating Text in the Linux Terminal Let us look at powerful tools and techniques available in the Linux command line for searching and manipulating text. These skills are useful in parsing log files, extracting specific information, and performing various text-related tasks efficiently. Searching for Text: grep: grep is a versatile command-line tool for searching text in files. It's often used with regular expressions for more complex searches. Basic usage: bashCopy code grep "pattern" file.txt Using regular expressions: bashCopy code grep -E "pattern1|pattern2" file.txt find: The find command is used to search for files and directories based on various criteria, including text content. Searching for files containing a specific text: bashCopy code find /path/to/search -type f -exec grep -l "pattern" \; ag (The Silver Searcher): An alternative to grep, ag is faster and more efficient for searching large codebases. Install it if it's not already available on your system. Basic usage: bashCopy code ag "pattern" /path/to/search Text Manipulation: sed (Stream Editor): sed is a powerful tool for text manipulation and transformation. It can be used to replace text, delete lines, and perform other operations. Replace text in a file: bashCopy code sed 's/old_text/new_text/g' file.txt awk: awk is a versatile text-processing tool that allows you to perform operations on text data, including filtering, formatting, and calculations. Print specific columns from a file: bashCopy code awk 'print $1, $3' file.txt cut: The cut command is used to remove sections from lines of files. Extract specific columns from a file: bashCopy code cut -d' ' -f1,3 file.txt sort: The sort command is used to sort lines in text files. Sorting a file alphabetically: bashCopy code sort file.txt uniq: uniq is used to remove duplicate lines from a sorted file. Removing duplicate lines from a sorted file: bashCopy code sort file.txt | uniq tr (Translate): tr is used for character-level text manipulation, such as translating or deleting characters.
Translate characters to uppercase: bashCopy code tr '[:lower:]' '[:upper:]' < file.txt cut and paste: The cut and paste commands can be used together to manipulate columns of text. Combining columns from two files: bashCopy code cut -f1 file1.txt > col1.txt cut -f2 file2.txt > col2.txt paste col1.txt col2.txt > combined.txt These are just a few examples of the many text-processing commands available in the Linux terminal. Depending on your specific needs, you can combine these commands and use them in scripts to perform more complex text manipulation tasks. Linux System Information and Troubleshooting In this chapter, we will explore essential tools and techniques for gathering system information, troubleshooting common issues, and monitoring resource usage in a Linux environment. These skills are convenient for maintaining system health and resolving problems effectively. Checking System Information (uname, df, free) To gain insights into your system’s configuration and resource utilization, you can use a variety of commands: Command Description Example uname Displays basic system information such as the kernel version and system architecture. Uname -a df Shows disk space usage, including information about disk partitions and their available space. df -h free Displays memory (RAM) usage information, including total, used, and available memory. free -m Linux System Logs and Troubleshooting (journalctl, dmesg) Troubleshooting system issues often involves examining logs and messages. Two key commands for this purpose are: – journalctl: The journalctl command provides access to the systemd journal, which contains logs for various system services and events. This tool enables you to view and filter log entries, making it invaluable for diagnosing system issues. To display recent system logs: bashCopy code journalctl -xe – dmesg: Additionally the dmesg command displays kernel ring buffer messages, which can be useful for diagnosing hardware-related problems. It specifically shows messages related to hardware detection, driver initialization, and system boot. To view kernel messages: bashCopy code dmesg | less Monitoring Resource Usage (htop) htop is an interactive and feature-rich process viewer and system monitor. Furthermore, it provides a real-time overview of system resource usage, including CPU, memory, and processes. It looks like this: To install htop use the following command: Debian/Ubuntu: bashCopy code sudo apt update sudo apt install htop CentOS/RHEL: bashCopy code sudo yum install epel-release # This is needed for EPEL repository on CentOS/RHEL 7 and earlier. sudo yum install htop Fedora: bashCopy code sudo dnf install htop htop is an excellent alternative to the basic top command. In addition, it offers a more user-friendly interface and additional features for monitoring and managing processes and system resources. How to Customize the Linux Terminal (color schemes, fonts) Customizing the Linux terminal can make your command-line experience more enjoyable and efficient. Here are several ways to customize the terminal to suit your preferences: Customizing the Prompt (PS1): To customize your command prompt, you can modify the PS1 environment variable in your shell configuration file (e.g., .bashrc for Bash). Here's an example of a custom Bash prompt: bashCopy code # Add the following line to your .bashrc file PS1='\[\e[32m\]\u@\h\[\e[m\]:\[\e[34m\]\w\[\e[m\]\$ ' \u displays the username. \h displays the hostname. \w displays the current working directory. \[\e[32m\] and \[\e[m\] change text color (in this case, green for the username and blue for the directory). Customizing Terminal Colors: Most terminal emulators allow you to customize text and background colors in their preferences. For example, in GNOME Terminal, you can navigate to "Edit" > "Preferences" > "Profiles" and click the "Edit" button for your profile. There, you can customize colors under the "Text" and "Background" tabs.
Aliases: Create aliases for frequently used commands or command sequences. Here's an example: bashCopy code # Add the following line to your .bashrc file alias ll='ls -al' After adding this alias, you can use ll in the terminal to list files and directories in long format with hidden files. Customizing Tab Completion: You can create custom tab completion behavior for specific commands. For example, let's create a simple completion for a custom script named my_script: bashCopy code # Add the following lines to your .bashrc file _my_script_completion() COMPREPLY=($(compgen -W "option1 option2 option3" -- "$COMP_WORDS[COMP_CWORD]")) complete -F _my_script_completion my_script This completion script suggests options ("option1," "option2," "option3") when you tab-complete my_script in the terminal. Customizing Key Bindings: You can customize key bindings in your shell by adding entries to your shell's configuration file. For example, to bind the Ctrl+L key combination to clear the terminal screen: bashCopy code # Add the following line to your .bashrc file bind -x '"\C-l": clear' After adding this line, pressing Ctrl+L will clear the terminal screen. Using Oh My Zsh or Powerline: If you're using Zsh, you can install Oh My Zsh or Powerline to customize your prompt and add plugins. Here's how to install Oh My Zsh: bashCopy code sh -c "$(curl -fsSL https://raw.github.com/ohmyzsh/ohmyzsh/master/tools/install.sh)" After installation, you can change the Zsh theme and customize plugins in the ~/.zshrc file. Using a Custom Terminal Font: You can change your terminal font through your terminal emulator's settings. For example, in GNOME Terminal, go to "Edit" > "Preferences" > "Profiles" > "Text" to select a custom font.
0 notes
Text
How to Get Xbox Game Pass on the Steam Deck

Is It Possible to Play Xbox Game Pass Games on the Steam Deck?
Valve’s Steam Deck runs the Steam storefront and provides a few of the best games. That makes Xbox Game Pass the best product from its rival, Microsoft. While Steam doesn’t offer a gaming subscription service, it is still a general question to ask if Xbox Game Pass operates on the Steam Deck.
Advertisement
The brief answer is it does, but the procedure is difficult. You can enjoy Xbox Game Pass games on the Steam Deck in two ways.
First, install Windows on the Steam Deck in a multi-boot configuration parallel to the Linux-based SteamOS. This is not simple and might seem daunting to gamers who wish to play a game via their current Xbox Game Pass subscription.
Fortunately, the second method is less complex and doesn’t include immense tinkering, but the caution is that players must stream the game via Microsoft’s servers from Xbox Cloud Gaming. Adding a Microsoft Edge shortcut to the Steam Library allows players to enjoy Xbox Game Pass on their Steam Deck via Cloud Gaming. The method is from Microsoft, so you are not breaking anything essential on your desktop in any way.
Steps to Play Xbox Game Pass Games Using Xbox Cloud Gaming on the Steam Deck
These steps are for gamers comfortable with tinkering on the Steam Deck. These instructions are from Microsoft and depend on Xbox Cloud Gaming. Players will be streaming this game via Microsoft’s servers and not playing them straight on their Steam Deck, so remember that you will require a strong internet connection for a smooth experience, even for offline games.
Pre-Requisites
Connecting an external keyboard and mouse to the Steam Deck is important. You can utilize a touch keyboard (Steam button plus X) parallel to the touch trackpad and display, but it can make the procedure notably simpler to execute if you utilize a hardware keyboard and mouse.
Installing Microsoft Edge on the Steam Deck
The foremost part of this procedure is downloading Microsoft Edge onto the portable console. The procedure is very simple:
First, Boot the Steam Deck.
Then, input Desktop Mode. Hit the Steam button to show the Steam Menu, choose the Power option, and tap the Switch to Desktop tab.
Move to the Applications tab and select Internet > Web Browsers in the app.
Navigate to the Microsoft Edge tab in the apps menu and hit the Install tab.
Once done, close the Discover Software Center.
Adding Microsoft Edge to Steam
After installing the Microsoft Edge, you must add it to Steam:
First, go back to your Desktop on the Steam Deck.
Next, tap the Application Launcher icon.
Then, choose the Internet tab, right-tap on the Microsoft Edge button, and choose Add to Steam.
In the Add a Game screen, tap the Microsoft Edge tab. Choose the Add Selected Programs option.
Give Microsoft Edge Access to the Steam Deck Controls
After adding Edge to Steam, you should allow it to access the Steam Deck controls. In this part, a hardware keyboard will be best. Follow the institutions below:
Go back to Desktop on the Steam Deck.
Then, hit the Application Launcher tab.
Next, hit System > Konsole to launch a terminal window.
Input the below command into Konsole: flatpak –user override – -filesystem= /run/undev: ro com.microsoft.Edge.
After this, tap on the Enter key on the keyboard.
Lastly, exit Konsole by writing exit and tapping the Enter button on the keyboard.
Now, you can plug in the Xbox controller or utilize the preset layouts of the Steam Deck in Microsoft Edge.
Change the Launch Properties of Microsoft Edge to Open the Xbox Game Pass
Next, you should change how the Microsoft Edge browser functions after launching. We need it to launch the Xbox Game Pass website once we launch it.
Launch Steam by hitting the Steam tab on the desktop.
Next, choose the Library option.
Then, navigate to the Microsoft Edge option in the list. Right-tap on it and choose Properties.
In the Launch Options, you must add the following after @@u @@, which is already visible there. – -window – size= 1024,640 – -force – device – scale – factor=1.25 – -device – scale – factor=1.25 – -kiosk “https://www.xbox.com/play”
Remember that you must give space between @@ and -window-size.
Also, you can alter the controller layout (optional):
Right-tap on the Microsoft Edge tab in the Steam Library, choose the Manage option, hit Controller layout > Browse configs, and select the desired layout.
Then, choose Apply Configuration > Done.
You can also change the app’s name to Xbox Cloud Gaming (optional).
That’s it; you can now change again to Gaming mode through the icon on your desktop, choose the Microsoft Edge option in the Steam library, and sign in with the Microsoft account to enjoy the game catalog on Xbox Game Pass.
Also Read: How to Fix BlueStacks Problems
Frequently Asked Questions
Ques: Can I use Xbox Game Pass on the computer?
Ans: Yes! You can use Xbox Game Pass on your computer and smartphone.
Ques: How can I add Xbox games to Steam?
Ans: Sadly, no direct method exists to add Xbox games to the Steam Deck. But you can try that by using a third-party software such as UWPHook.
Ques: Does Game Pass function on Steam Deck?
Ans: Yes, of course! Players can add Game Pass cloud gaming on the Steam Deck to enjoy Xbox games on their Steam Deck device.
Ques: Can I play the Xbox games on my Steam Deck?
And: Yes! Players can add the Microsoft Edge browser as a Game Pass and enjoy their Xbox games on Steam Deck.
Ques: Which cloud gaming platform is best for Steam Deck?
Ans: Right now, the Microsoft Edge browser, a.k.a. Xbox Game Pass or Xbox Cloud Gaming, is one of the popular gaming services for Steam Deck.
Source:https://hariguide.com/how-to-get-xbox-game-pass-on-the-steam-deck/
0 notes
Text
The issue in your most recent reblog is because apple is evil. (And also a legitimate contributing factor to the computer illiteracy of a growing proportion of The Youth™, because apple in particular but also mobile OSs in general are much much more hostile to end users actually seeing any of the structural system.)
It sounds like the issue you're having is Finder being a twat, which is apparently a Thing among Mac users?
Personally when I'm trapped at the mercy of an unforgiving file wrangling program I tend to go poke around in the command line, because at least then you're not trying to deal with '''helpful''' automatic filtering and whatnot.
Oh there's also the fact that Mac uses 'aliases' which I think are shortcuts that behave like files?
Files vs programs:
Slightly complicated that programs can in some circumstances also be - or at least behave like - files. But basically (I am not a computer scientist but I have spent quite a lot of time fucking around with computers so 🤷♀️) files are. Little (or not so little) packets of information that can be parsed into something meaningful if it's treated correctly. Programs are essentially collections of code that combined make a framework of 'behaviours' that can be performed. Basically, Programs do stuff. Files get stuff done to them. Excel is the program the spreadsheet is the file.
In terms of using a computer the main thing to worry about there is that they will be treated differently by the computer.
File types: Tells The Computer How To Treat The Contents. Spreadsheets made in excel are Excel Files (.xls I think these days) so the computer knows to open them in excel etc.
I don't know if it's possible natively but there's phone apps out there that can convert files for you - a lot of the decent file management ones do, I believe.
Location:
Okay so I have no idea how it works on a Mac (although it's based on Linux so it should be at least broadly similar) but in general. Okay you have to remember that a LOT of technical terms are basically just 'the thing the developers thought it was closest to irl', so shit like 'location' is sort of. Relative. But basically your location is 'what file directory am I (the computer) currently looking at?'. And directories are often sub directories of other directories all the way up to 'which physical memory device is this on?' so you'll see people talking about Paths which is basically 'how does a computer that doesn't know where your file is get to it?' which is where the 'C:\Documents\My Documents\Photos\LastChristmas' comes in. (I believe there's a way to get Mac's file Explorer to show that for the current file as default, which might be handy if you're having trouble figuring out where documents are in relation to each other)
Knowing a particular file or directory's location (PATH in Windows) is particularly important if you're doing anything in the terminal, because you want to make sure any commands you're running are being done on the right thing.
I think this is particularly confusing in Macs because it seems to sort of grab the most 'likely' files it thinks you want without actually specifying where they are actually stored on the device, which is where you're running into problems, since the Photos/Images/Documents aren't being properly defined at the User Interface end.
I need to go cook dinner now, but I'll leave some of the more helpful links I've found in my investigation into what the hell Mac have done to file management
A somewhat more in depth user guide
Hard Drive Backup
Also with the state of Internet searches atm I would suggest looking in places like Reddit or stackoverflow for answers rather than the internet as a whole
Why do 70% of people Understand Computer and refuse to tell the other 30% of us how to achieve enlightenment
#macs make no sense to me#but I'm used to trying to figure computer shit out with minimal info/knowledge
2K notes
·
View notes
Text
Linux shortcut to open terminal

Other environments also have their own keyboard shortcut menus, so the steps below should still apply. The following are the steps that we used to create custom keyboard shortcuts:Īgain, these steps are for the Xfce desktop environment. Using this shortcut, we can move the window one workspace to the right. Using this shortcut, we can move the window one workspace to the left. Using this shortcut, we can move the window one workspace down. Using this shortcut, we can move the window one workspace up. The following is the list of workspaces shortcuts: Keyboard Shortcuts Using this shortcut, we can record a screencast. With the help of this shortcut, we can take a screenshot of a window to the clipboard. With the help of this shortcut, we can take a screenshot of an area to the clipboard. Using this shortcut, we can take a screenshot of a window. Using this shortcut button, we can take a screenshot. The following is the list of screenshot shortcuts: Keyboard Shortcuts Using this shortcut, we can move the cursor forward one character. Using this shortcut, we can move the cursor to the end of the line. Using this shortcut, we can move the cursor backwards to one character. Using this shortcut, we can move the cursor to the beginning of the line. Using this shortcut, we can cancel the currently running command. Using this shortcut, we can close the terminal window. The following is the list of terminal shortcuts: Keyboard shortcut With the help of this shortcut, we can resize the window. Using this shortcut, we can minimize all windows. Using this shortcut, we can activate the window menu. Using this shortcut, we can move the window. Using this shortcut, we can open the command window. Using this shortcut, we can open the window. We used this shortcut to open Kazam (screenshot/screencast tool) We used this shortcut to open the Application Finder. In Kali Linux, we used this shortcut to maximize the current window. With the help of this shortcut, we can close the current window. Using this shortcut, we can open a new command line terminal. The following is the list of General Shortcuts: Keyboard Shortcut These Kali Keyboard shortcuts will make it easier to handle Windows, screenshots and workspaces. It is also applicable in the case of Kali Linux. When using an operating system, a basic understanding of its keyboard shortcuts is usually beneficial. Other desktop environment, such as GNOME and KDE, may have an alternative keyboard shortcut. In this tutorial, we will assume that we are using Xfce, Kali's default desktop environment. In addition, we will show that how we can customize our own keyboard shortcuts. In this tutorial, we have put a list of helpful keyboard shortcuts into a cheat sheet, so we can refer to it whenever needed. In order to increase our productivity in Kali and save some of our time, we can learn some keyboard shortcuts. The process of acquiring reconnaissance information before launching an attack and finally using penetration testing equipment against a target system frequently comprises a lot of keystrokes and perhaps a few command-line terminals. The users of Kali Linux have a lot of typing ahead of them.
0 notes
Note
iirc a while ago you mentioned disliking microsoft - just wondering if you have any recommendations for another os to use and guides to read on it? ive been considering switching from microsoft for a while now but because ive had my computers for a while it feels like a big change
i get it! i've been split pretty much 50/50 windows and mac for my whole life (with some experience with linux) and i'd say they arent all that different in the most important ways. the barrier for mac, which is quite a big one, is that you need apple hardware like a macbook. however, if you acquire one, you'd probably find the major things like the file system, using applications, etc are very intuitive regardless of what specific OS you are most used to. On mac, most things are very streamlined and self contained, applications do not use a central registry and while they store data in shared folders (for example, "application_support" which is roughly equivalent to something like "APPDATA" on windows), applications are mostly contained within themselves. for an illustrative example: firefox has a .app package in the applications folder, and stores its cache and history in application support, and that's it. as a result, uninstalling apps is almost always a matter of deleting the app file and not using a central uninstaller in settings (though some more complex apps have their own uninstaller). shortcuts and aliases are very rare, and in my opinion most things are easier to find than on windows. its difficult for me to explain exactly what i mean, but there is only one "layer" to macOS. windows is built on principles of backwards compatibility, so there can be a lot of junk where a more central cohesive system would be easier to use and less likely to break. one of my strongest frustrations with windows is that it has two entirely separate (3 if you count the registry) applications for changing settings, and they look and behave completely differently. apple's cohesion is a trade off, as it requires axing functionality that isn't common or popularly necessary anymore (RIP 32 bit programs), but i find it's absolutely worth it. in all, the way macOS functions is a lot like how a phone does, in terms of the way its designed, though i'd argue its more like an android than an iphone. it has a reputation for being locked down and less customizable, but i'd say that isn't accurate for most useful or desirable tinkering. it requires using the terminal and learning some unix commands but it's quite straightforward once you do, and less likely to break or frustrate you as windows is (in my opinion). linux of course is leaps and bounds above both proprietary systems but that's not really my area of expertise. at the end of the day, windows is accessible, that's its biggest advantage and the source of a lot of its problems. it has to run on old architecture, cling to obsolete and archaic systems because that's what people know and expect, and appeal to microsoft execs by jamming in new useless features to impress clueless shareholders. the main issues with microsoft is that it wants to be apple, and its management pushing cortana, and the all things people hate about windows 8, 10, and 11 is completely at odds with its fundamental design principles. that's why its so terrible and so ugly to me. macOS is like if those features were thought out, intuitive, and part of a well designed whole, instead of being wasteful, bloated, and a constant annoyance to the people who actually desire the unique things windows has to bring to the table.
oh and to answer your actual question since this just turned into one of my rambles: i would recommend trying out a linux distribution (like ubuntu or debian) by booting it on a flash drive and playing around with it to get a feel for the file system and other core aspects. its designed somewhat similarly to mac since they are both unix-like but its free and open source. if you hate it then its probably best to not spend a lot on a macbook. if you live near an apple store (or another dept. store that has electronics display models) you can go in and play around on one. there's lots of guides online, though i find its best to just fuck around and if things go wrong, seek answers online. also one last thing is that if you do decide to go with a mac, its no problem to just keep using windows for what you need it to. i have an old PC laptop i use to play video games that only run on windows after all.
15 notes
·
View notes
Text
False IDLE(s): Python's built in text editor is the ONE!
When I started to learn Python, I was working my way through a text book and an overwhelming supply of YouTube tutorials to try my hand at being a digital wizard. Now I won't be covering the fabled 'Tutorial Hell' that many of us who are self taught get trapped in, screaming for relief, surrounded by piles of abandoned code taunting us from every side. What I want to share was the never ending saga of code editor/environments pushed on you from all sides, also known as IDE's. Here's a snippet from CodeAcademy defining an IDE:
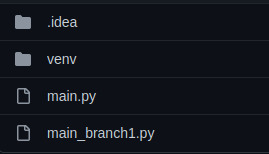
Sounds pretty cool right? That's because it is! It seemed like every tutorial I read preferred on over another. 'Learn Python 3 the Hard Way' by Zed Shaw had me start out with ATOM text editor (goodnight sweet prince), it was simple, but to my newbie brain, full of settings i was sure I'd never understand. Then a few tutorials pointed out the amazing features and capabilities of PyCharm so I downloaded a free community edition right away! So sleek and flashy with cool highlighting, but what were all these weird files and directories showing up around my helloworld.py file? I was already up to my ears in esoteric ideas and syntax, no one said anything about surprise files and directories! All this AND the resources this program were using up was making for slow loading and I could hear my poor little laptop begging for mercy. VsCode was more aesthetically pleasing for me, and supported multiple languages but -there's those damn funky files again!
There were some editors I found that were minimal , but they all had little things that bothered me or did something for me that I wanted to understand before handing over control to the automation gods!
As beginners we're at our most susceptible to marketing manipulation and advertising. The waves of information are hitting us from every side and everyone is offering safe harbor in their particular product and solution. It's the paralysis of choice! But fear not, because the Zen of Python can guide us here, reaching out through the darkness like the beam of a lighthouse:
SIMPLE IS BETTER THAN COMPLEX
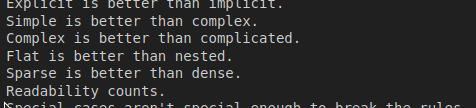
Just for the sake of this tutorial imagine that as soon as I read the Zen of Python, clouds parted and a serpent delivered a message, whispering in my ear "Look into the language for your answers".

To my surprise, Python has an editor bundled into it BY DEFAULT that's simply called IDLE (Integrated Development Learning Environment) and if you are coding with Python, then you already have it at your fingertips!
But how easy is it to access?
How To: Python IDLE
In Mac or Linux, open a terminal by either searching for 'terminal' or often times CTRL + T will launch it automaticlally. Once you find it you should be looking at something like this:
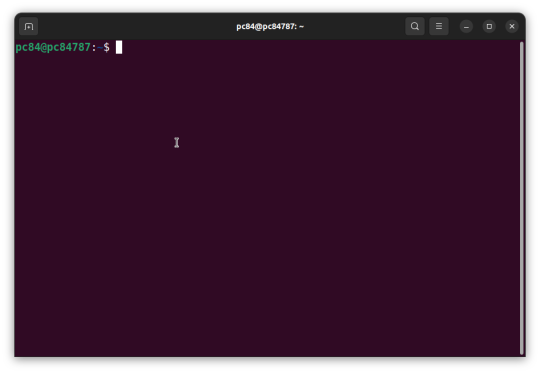
The little blinking block is waiting for you. Type all lowercase idle and hit Enter.
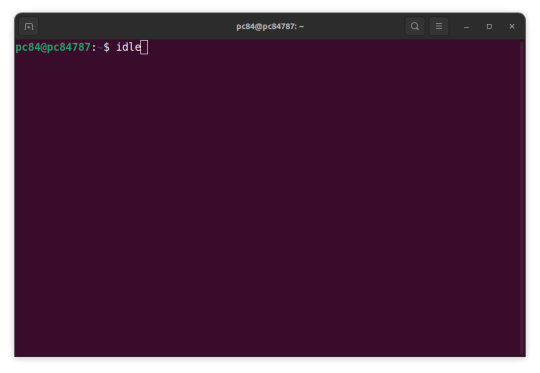
For Windows you should have some menu shortcuts like these:

Type, Click and that's it! You have just launched Python's very own text editor and development environment!
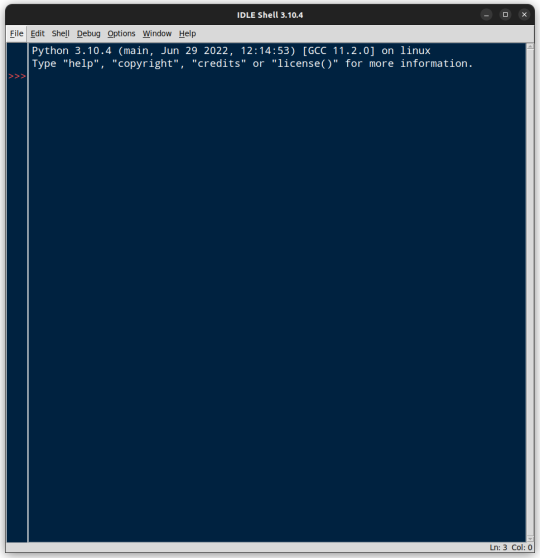
You might wonder where the familiar text editor is since the window clearly says IDLE Shell at the top. The Python Shell aka REPL (Read Evaluate Print Loop) is an important tool and has it's uses, but I find myself most often opening IDLE for the text editor.
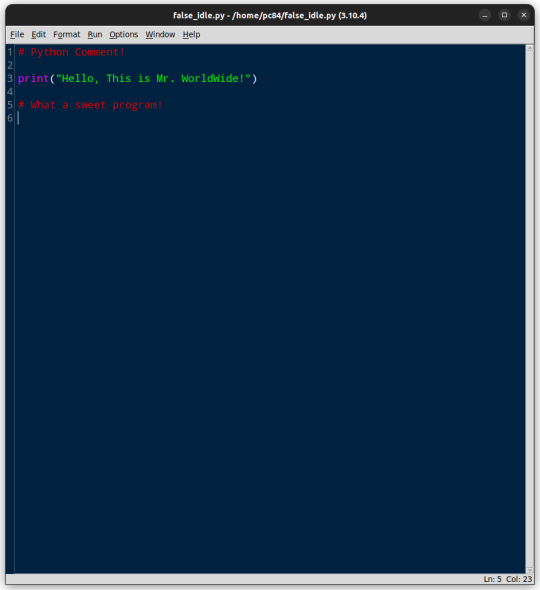
We can get to the text editor by finding the File drop-down and selecting New File. Alternately the keyboard shortcut is Ctrl + N
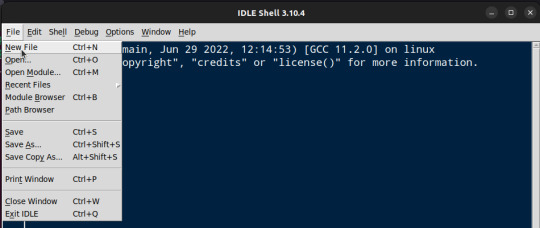
Voila! A blank canvas!
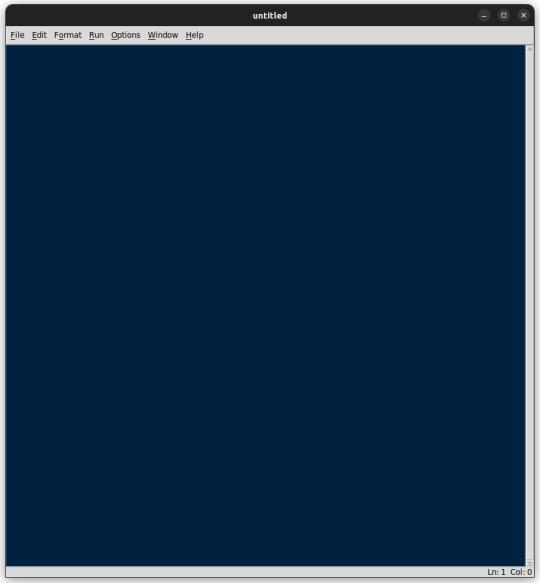
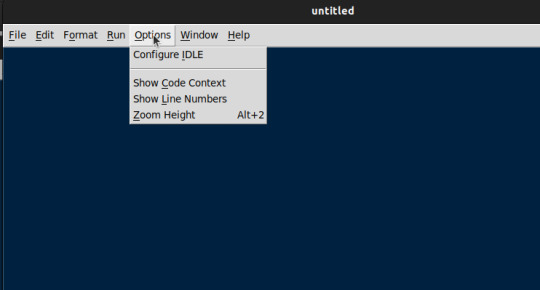
Let's enable the numbered lines that we're used to seeing by selecting the Options drop-down and choosing Show Line Numbers
Enter a Hello World program .....
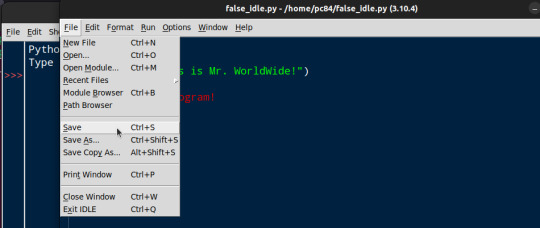
Before running the program we want to save. Navigate to the File drop-down and selectSave File or CTRL + S
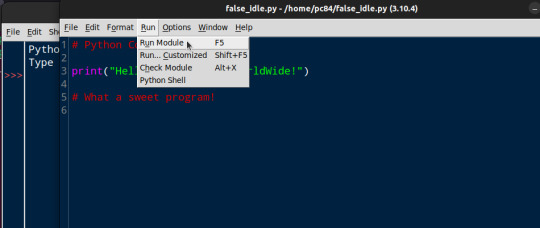
Once the program is saved, navigate to the Run drop-down menu, selecting Run Module to run the program. Once again you could just hit the F5 key to bring economy to your movements (if you forgot to save, IDLE will remind you before allowing you to continue)
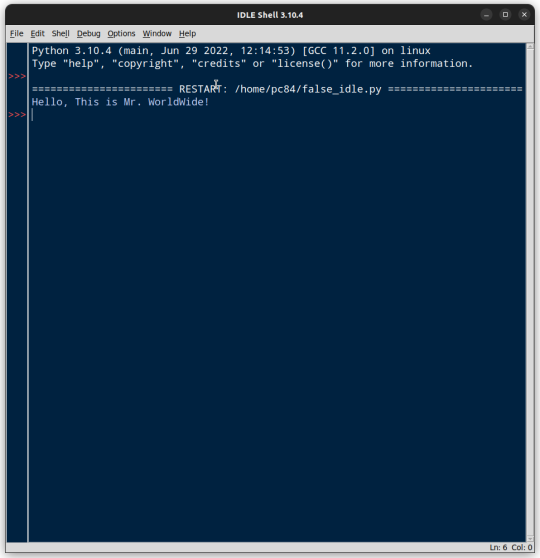
Looks like Mr. Worldwide has entered the chat!
Everything is working as it should! If you are coding along with this you may be wondering two things. Why is your editor so painfully WHITE (Bright light! Bright light!), while these examples are relaxing you with their cobalt blue. Why does your IDLE still launch into the Shel when opening?

Like everything else so far, this is an easy fix.
Dip into that Options drop-down menu and select Configure IDLE. This brings you into the Settings menu where we change font size and face (I've tried a bunch of fonts, none seem to be as clear and pleasing as the default) and make many of the configuration changes to make our hearts sing.

Let's take care of the 'Theme' first so our eyes can be awash in the deep blue of this little tutorial. Switch from Fonts/Tabs to Windows .
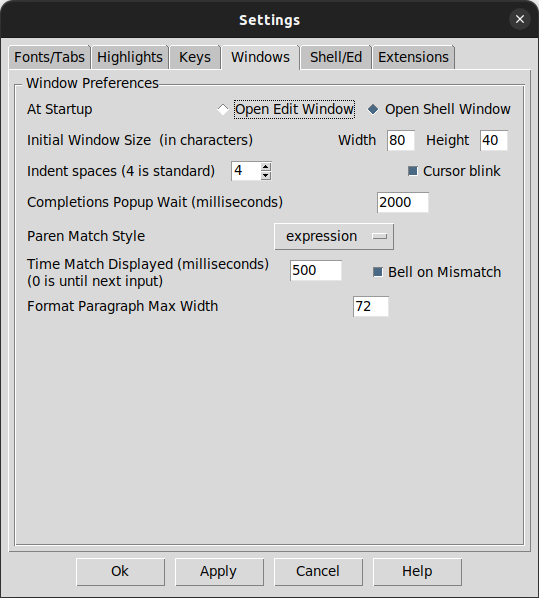
The option you're looking for is right at the top. Select Open Edit Window

Click Apply and your settings will be saved.
To get our initial configurations aligned to our delicate sensibilities, Switch from Windows to Highlights. Now to the right ( your right), click the drop-down menu and select IDLE Dark. Ahhhhhh...
Your eyes are already relaxing after searching for the perfect simple IDE for Python for so long.
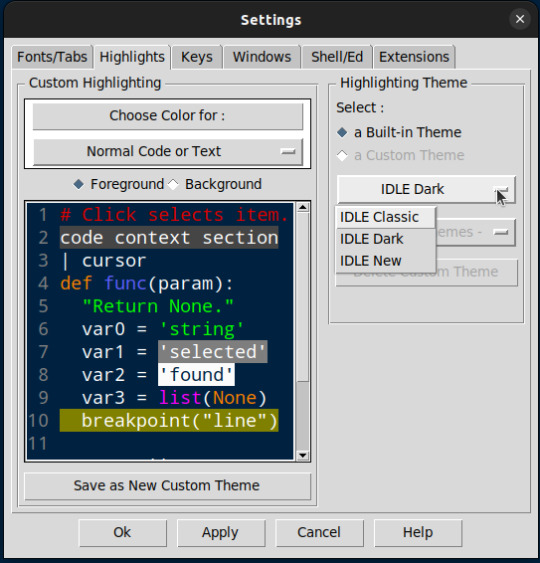
Click the Apply button after you make any changes and you are ready to code, leaving a little bit of the worry and complexities noobs are pounded with on our journey to high digital sorcery.
There will be a time in our growth as Python programmers when we will be ready for all the virtual environments, automated package importers and GIT integrations you can shake a stick at. In the mean time, IDLE is a perfect middle ground that is reliable, simple and is even written in the very language we are learning!
Every text editor and IDE has it's audience and it's place. You my find that Pycharm , Vims, VsCode or even Emacs is a perfect fit for your Python development and to you I say hurrah! What's important is that we find tools that feel comfortable for each of us and let us focus on learning and building rather than fumbling around endlessly with the tool itself.
Hopefully you find IDLE is a hidden gem of an IDE that serves you well in your learning journey.
One last thing weary traveler.....

Happy Coding!
9 notes
·
View notes
Text
like, the most recent instance is that a bit ago i saw a video where the guys mentioned that a big thing they loved about their desktop envs on linux was being able to hit a key combo and reach specific apps instantly. that got me thinking - i really like that idea, i want to have the same on my mac
so the goal: have something where i can hit a key combo, and instance get to or launch that program, from wherever
looking around, mac is quite limited with this for built-in stuff. i've tried using AppleScript before, but setting that up was a PITA, so i tried using apple's built-in shortcuts app to add services to the menu bar which i could link-up with a global key combo from the settings app
that worked alright, i could see what shortcuts i had by just opening the menu and the way macs treat opening an app is unique and works well for this stuff, but there were some issue. the big one is that some apps, such as discord and my fucking terminal, don't support the global services menu. i worked around the terminal thing by adding duplicates of those key combos in it that just call open to replicate it there, but it was a little flaky, and still didn't work in discord
well today my brain decided it was time to get a properly thing going. i had been search around for what libraries do global key-logging, and found one that works fairly nicely, so i wrote a tiny rust program that checks each key input, captures the ones i'm after, and execs the open command for the right programs
this works a fucking dream. it's super snappy, works in every single app regardless of services support, and is very extendable for me to add completely custom logic to whatever key combo i want in future. just a little bit of code and the exact thing i wanted now works near-perfectly
it's things like this that i enjoy - having small problems and just solving them in novel ways using some code - and i think it's a skill that's worth having for most people
you really don't need to know how a computer works to use it, but knowing how it does and how to make it do what you want really does improve the experience of using it as a whole. you don't even need to be good at this shit, just enough to make a little bit of code that automates a task or improves the usability of something, it'll still make things better in the long-run
one of my favourite things about being able to program is that i can almost always figure out a solution to some annoyance or issue i'm having with my computers
#lizabeth talkabeth#there's so much code around us and governing our lives now#knowing how it works and why it works how it does is so useful#even just as background knowledge for day-to-day nonsense#like i'm certain that i'm better at using uis now than i used to be since i started making them#i can see through the design language and intended flows much easier and get to where i want based on where i think the devs who made the#thing would've put it#like whenever there's a question of 'why is that option there'#the answer is almost always#because the devs thought it made sense and it does in the mind of a dev
1 note
·
View note
Text
Visual Studio Ctrl F5


Visual Studio Ctrl F5 Tutorial
ConfuserEx for Visual Studio integrates the free and open source ConfuserEx protector into Visual Studio for easy automatic obfuscation of release builds and ClickOnce applications. ConfuserEx is included with this extension. Set up the ConfuserEX protections to enable in the ConfuserEx options page in Tools-Options. Saved Window layouts. Allison shows how saved window layouts can save you time when you’re writing code. No matter if you need different windows for debugging or working on different work items, she shows how saving layouts or different tool panels can speed up productivity in Visual Studio. Note: Projects should be run using F5 or the Debug menu for full debugging functionality. Running from the built-in terminal will not provide all features. Install from the Visual Studio Code Marketplace or by searching within VS Code. Please see the Flutter documentation for using VS Code. Reporting Issues. Visual Studio Code lets you perform most tasks directly from the keyboard. This page lists out the default bindings (keyboard shortcuts) and describes how you can update them. Note: If you visit this page on a Mac, you will see the key bindings for the Mac. If you visit using Windows or Linux, you will see the keys for that platform.
Visual Studio Code Ctrl F5
ShortcutDescriptionCtrl-XorShift-DeleteCuts the currently selected item to the clipboard. Without selection it cuts the entire line to the clipboard.Ctrl-CorCtrl-InsertCopies the currently selected item to the clipboard. Without selection it copies the entire line to the clipboard. Ctrl-VorShift-InsertPastes the item in the clipboard at the cursor (with selection in clipboard), or at the next line (with line in clipboard). Ctrl-ZorAlt-BackspaceUndo previous editing actionCtrl-YorCtrl-Shift-ZRedo the previous undo actionCtrl-Shift-VorCtrl-Shift-Insert Pastes an item from the clipboard ring tab of the Toolbox at the cursor in the file and automatically selects the pasted item. Cycle through the items on the clipboard by pressing the shortcut keys repeatedly Ctrl + .orShift+Alt+F10 Opens smart tag and resolves a wide array of suggested code refactorings Esc Closes a menu or dialog, cancels an operation in progress, or places focus in the current document window Ctrl-S Saves the selected files in the current project (usually the file that is being edited) Ctrl-Shift-SSaves all documents and projectsCtrl-PDisplays the Print dialogF7Switches from the design view to the code view in the editorShift-F7Switches from the code view to the design view in the editorF8 Moves the cursor to the next item, for example in the TaskList window or Find Results window Shift-F8Moves the cursor to the previous item, for example in the TaskList window or Find Results windowShift-F12Finds a reference to the selected item or the item under the cursorCtrl-Shift-GOpens the file whose name is under the cursor or is currently selectedCtrl-/Switches focus to the Find/Command box on the Standard toolbarCtrl-Shift-F12Moves to the next task in the TaskList windowCtrl-Shift-8Moves backward in the browse history. Available in the object browser or Class View windowAlt-Left ArrowGo back in the web browser historyAlt-Right ArrowGo forward in the web browser history
1 note
·
View note